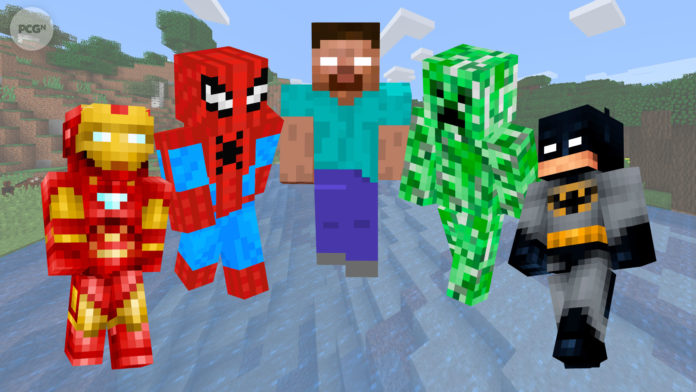
Are you looking for a method to customize your Minecraft experience more and tips on how to download Minecraft skin? For example, do you want to personalize your Minecraft player avatar? Then you’re in luck since Minecraft skins allow you to do just that! You can customize your Minecraft appearance by downloading and installing a custom skin, whether you’re interested in having a unique look for your avatar or simply want your friends to be able to locate you right away.
Let’s get started if you’re ready to learn more about this part of Minecraft (and extend your existing Minecraft experience).
What are Minecraft Skins?
A Minecraft Skin is a set of textures applied to a person or monster model to customize its look in the game. Simply told, Minecraft Skins enable you to change the appearance of your Minecraft player character.
To put things in perspective, every Minecraft player avatar has a preset classic skin called “Steve.”
Minecraft skin download: Minecraft is a popular game that has existed for many years, even though there are so many complex games on the market. Minecraft’s popularity is still enormous today, as it is one of the most imaginative games available. You may also download skins, customize them, and alter your Minecraft avatar in the game. So, if you’ve been thinking about how to download Minecraft skins or which ones are the finest, don’t worry; we’ve got you covered. The following is a step-by-step tutorial on downloading Minecraft skins and understanding how they operate on a PC and a mobile phone.
Use Minecraft Skins: PC
Here’s how to use Minecraft skins for the PC:
1. Ensure the game is closed before updating or putting in a new skin.
2. Visit a reputable Minecraft Skins website and choose the skin you want. It may be downloaded to your PC. This is what the image file should look like:
3. Next, log in to your account on Minecraft.net.
4. Once you’ve logged in, go to your profile page by selecting Profile from the drop-down menu next to your email address (found in the upper right corner of the screen). The Skin tab should be visible from there. Select it by clicking on it.
5. The first stage will ask you to choose between Classic and Slim (“Steve” or “Alex”) models. You should choose the model used to create your Minecraft skin.
6. You’ll be prompted to upload your own skin in the second stage. Go ahead and click the “Submit” button. Add the Minecraft skin you obtained as an a.PNG file by selecting a File and uploading it.
7. Your skin will display on the website if a successful upload. Click the Upload button.
8. Close Minecraft.net and begin playing your game. Your Minecraft player avatar should have a new skin if you followed the steps correctly!
How to upload Minecraft skins to the game?
Now that you’ve generated and downloaded your Minecraft skin, it’s time to upload it to your PC’s Minecraft account. Follow these steps to see how it happens:
• Open Minecraft on your PC and go to the ‘Skins’ option.
• Then go to ‘Browse Skin’ to find the ‘Skin’ file you downloaded.
- Locate the a.png file and choose the skin.
• To acquire the new skin for your character, restart the game.
How to download Minecraft skin for iOS
Minecraft is also available on iOS devices. Skins are also available for the mobile edition of Minecraft. To get the software, you must spend Rs 349 on the Apple App Store. This software is compatible with iPhones and iPads running iOS 8 or later.
How to update Minecraft for PC?
If you want to get the most up-to-date content and skins for Minecraft, be sure you update the game via the official website or wait for it to update automatically on your PC. Minecraft must be updated through the Microsoft Store for Windows 10 users.
• On the top-right, click the three-dot menu.
• Choose from a variety of downloads and updates
• Select Minecraft from the list of programs to update.
• The PC version of Minecraft is up to date.
Use Minecraft Skins: Java Edition
If you’re using Minecraft: Java Edition, you may change your Minecraft skin by following these steps:
1. Make sure your application is closed before updating or installing a new skin. You can continue to use the Minecraft Launcher.
2. Visit a reputable Minecraft Skins website and choose the skin you want. It may be downloaded to your PC.
3. Open the Minecraft Launcher, go to the Skins page, and select the New Skin option.
4. You’ll be prompted to pick your Player Model, as on Minecraft.net (Classic or Slim). Choose the appropriate option.
5. Next, browse to where you saved your downloaded Minecraft skin by clicking the Browse option beneath the Skin File header. On the pop-up window, select the skin and click the Open option. The model on the Minecraft Installer will be sporting the new skin, so you’ll know if it uploaded successfully.
6. Click the green Save & Use the icon in the lower right-hand corner of the page if you like how it appears.
How to find the current Minecraft version
By going to the bottom-right of the Minecraft home screen, you can see what version of Minecraft is currently running on your PC.
How to get Minecraft modifications and how to utilize them
Mods are helpful because they allow you to add new objects to the game, such as weapons, blocks, and armor. It expands your gaming choices and allows you greater control over Minecraft’s graphical aspects. You can get Minecraft modifications through the Minecraft Forge website, a free server with many easy-to-install Minecraft mods. When you download changes from Minecraft Forge, you can be certain that you are not infecting your computer with viruses.
The Skindex
The Skindex has always been the finest source to get any skin a gamer could want.
Players will be greeted by the latest and finest Minecraft skins as soon as they enter the Skindex. Other people develop and alter these skins, which are then submitted to the Skindex. Players may search for and download their preferred skin after they’ve arrived at the Skindex.
1. Players must go to the official Minecraft website after downloading the skin. Players must complete the following stages on the website: In the upper right corner of the page, click Log-In.
2. Create a Mojang or Microsoft account and log in.
3. Select the Skin option from the left-hand side of Profile.
4. Select Slim or Classic. 5. Select Upload Skin from the drop-down menu and locate the skin file on your computer (check downloads)
6. Choose the file and upload it.
Players’ skins should load if they follow the guidelines correctly. It is usually an instant transformation, although it might take a few minutes in rare cases. Players will need to close and re-open Minecraft to ensure it has been uploaded correctly.
Conclusion
That’s all there is to it! This is a fast – but comprehensive – tutorial on how to use Minecraft skins. Aside from being an open-world game, Minecraft’s degree of customization only adds to the game’s replay value. If you’re tired of playing Batman, try taking on the role of The Joker. Do you no longer wish to be Darth Vader, the Dark Side of the Force’s spokesman? Then put on the Jedi Master Obi-Wan Kenobi Minecraft skin.
What’s fantastic about the Minecraft community is that there will always be fellow players willing to share their skins for free. Some even accept special requests! So, if you can’t find a skin you like, simply wait; it’ll appear sooner or later! We hope this article on how to download Minecraft skin is useful to you.


