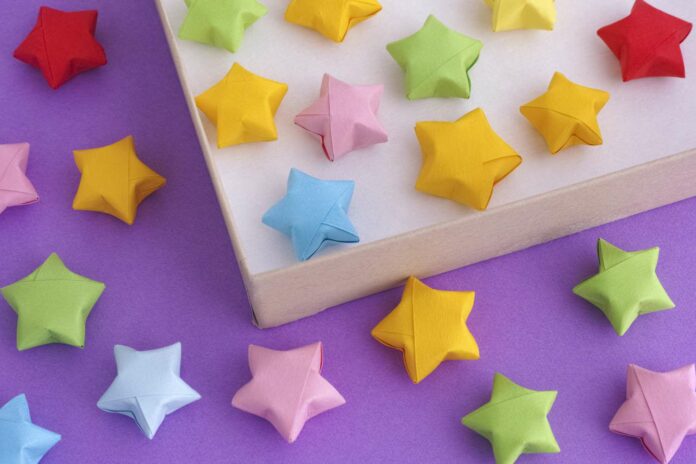
Origami star – Discover how to make these simple origami lucky stars using just one strip of paper. These adorable 3D stars are also called puffy stars or wishing stars. You can put them in a glass jar, showcase them on a shelf, gift them to a friend, or connect them to make a decorative string.
Just follow the given guide below. It is a simple and fun paper star origami project suitable for both kids and grown-ups.
Origami Star
Would you like to learn how to create a small paper star? Today, I have a simple origami guide to show you how to fold these. These cute origami stars, also called wishing stars or puffy stars, are easy, enjoyable, and quite addicting to make. You’ll find yourself with a bunch of tiny stars you can put in a jar and show off in no time.
You can use these stars to decorate a present, as New Year’s party decorations (they make a great mini garland), place them in a jar or vase, or even turn them into a bracelet. My favourite things to do with them are connecting them to a garland and covering or wrapping them around the small Christmas tree.
Make Your Own Paper Origami Stars
Origami lucky stars, which are also called wishing stars, are believed to bring good luck when you fold them. They’re said to bring even better f you give them to someone. If you fold a 100 and give it to a friend, that fortunate friend can make a special wish.
You can choose anyway; these stars look beautiful when put in a jar or a bowl, making them a delightful gift.
Paper Strips of Origami Star
- To create each star, you’ll need a strip of paper about 10 inches long and either 1/4 inch or 1/2 inch wide. If you want bigger stars, use wider strips.
- The wider the strip, the larger your stars will be. You can choose paper strips that are 1/4 inch, 1/2 inch, or even 3/4 inch wide, and they’ll all work.
- In this guide, we used scrapbook paper cut into strips 12 inches long and 1/2 inch wide. You can use any lightweight paper you have, like magazines or gift wrap, as long as it’s not too thick, like cardstock.
Materials:
Paper for Origami Stars:
- You can create these stars from various types of paper, like sheet music, plain printer paper, or old magazines. I used scrapbook paper for the stars I made, which is a bit thicker but still does the job.
- You can either purchase pre-cut Origami Paper Star Strips or cut your own from your favorite patterned paper, making sure they’re 1/2 inch wide and 12 inches long.
How To Make Origami Stars using paper
Instructions:
- Start with a strip of paper, color side up.
- Fold the strip in half lengthwise, then unfold it.
- Fold the top right corner down to the bottom edge of the paper, creating a triangle.
- Fold the bottom left corner up to the top edge of the paper, creating another triangle.
- Fold the top right corner down to the bottom edge of the paper again, creating a smaller triangle.
- Fold the bottom left corner up to the top edge of the paper again, creating another smaller triangle.
- Continue folding the corners in this way until you have a small pentagon.
- Tuck the end of the strip into the pocket of the Pentagon.
- Gently pull on the sides of the pentagon to inflate the star.
Tips:
- Use thin paper for best results.
- If you’re using patterned paper, make sure the pattern is facing up when you start folding.
- You can make your stars bigger or smaller by using different paper strips of different sizes.
- Experiment with different colours and patterns to create unique stars.
Things You’ll Need
Origami Lucky Stars are easy and fun to make and a great way to use up scraps of paper. You can use them to decorate your home, give them as gifts, or even wear them as jewelry.
Materials:
One strip of paper, approximately 1.5 cm x 29 cm (0.6 inches x 11.4 inches)
How to Make a 5-Pointed Origami Star
To create a beautiful five-pointed origami star, follow these simple origami step by step:
Materials:
- A square piece of paper (preferably origami paper)
Instructions:
Creating a Pentagon Base:
- Fold the square paper diagonally in half, creating a triangle.
- Unfold the triangle and fold it diagonally in half again, creating a smaller triangle.
- Align the right corner of the triangle with the center crease, forming a flap.
- Fold the flap down, aligning its edge with the triangle’s bottom edge.
- Cut off the excess paper along the folded edge, creating a pentagon.
Forming the Star:
- Select one corner of the pentagon and fold it towards the center point, creating a crease.
- Unfold the crease and repeat the process for the remaining four corners.
- With all creases made, carefully pinch all five corners together, bringing them towards the center.
- As you pinch, the pentagon will collapse into a three-dimensional star shape.
- Gently adjust the folds and points to refine the star’s shape.
Your five-pointed origami star is now complete. You can use different colors of origami paper to create a variety of vibrant stars.
Some FAQs
What type of paper should I use to make an origami ninja star?
You can use any type of paper, but thicker paper will make a sturdier ninja star. Construction paper or origami paper are good choices.
How big should my paper be?
The size of your paper will determine the size of your ninja star. A 6-inch square of paper will make a ninja star that is about 3.5 inches in diameter.
How can I make my origami ninja star more durable?
You can make your ninja star more durable by using thicker paper or by reinforcing the folds with tape.
Can I use origami ninja stars as weapons?
No, origami ninja stars are not sharp and should not be used as weapons. They are for decorative purposes only.


